Saturday, May 04, 2013

One Step at a Time

Woodbury, Connecticut

Now things really slow down. I'm close, but want to get a firm fix on exposure time for the print and tonal adjustment for the negative. I'm not familiar enough with these two new papers to evaluate the wet prints. The tests have to be fully processed and completely dried to see how close they really are to what I want.

Pretty Decent Step Tablet Print

Woodbury, Connecticut

This step tablet test is about as good as it's going to get. There is the slightest whisper of tone in the 0% patches on top, next to the strip masked by the Rubylith (I don't want 'full paper white'). If you look at the strip on the far right side the separation between the dark patches and the surround disappears at the 99% level. Close enough. The gang test beneath wasn't given enough exposure. You can see the edge of the negative material. Problem now is that the paper I ordered on Tuesday still isn't here, I can only make a few more prints before the new stuff arrives.

Still Testing

Woodbury, Connecticut

The beatings continue. Morale has yet to improve. Hope remains.

Plus, the batteries in my bluetooth mouse and keyboard have apparently all died. I have to drive to Staples to get more.

Friday, May 03, 2013

New Curve

Woodbury, Connecticut

The exposure test confirmed that, as I remembered, the vac frame glass needs 50% more exposure than the plain frame, which also sits a little closer to the tubes in the pizza oven configuration. To use the other half of the sheet I'd coated, I decided to output a new step tablet with a more gentle curve applied to it. I think my earlier tests are actually a little too contrasty in the middle values, so I'm pulling back on that.


Looks promising in the developer.


Really nice and smooth in the wash tray. Need to examine it dry to see for sure what's happening.

New Configuration

Woodbury, Connecticut

I'm having trouble with the OHP film sticking to the coated sheet of Pt/Pd paper. Pictorico doesn't do it as much as Fixxons, but the problem is still there. It may be that the material needs either a very long drying period or a short period of forced drying with heat. However the two new papers, Magnani/Revere Platinum and New Platine, both are showing that they want to be printed much drier than my old favorite Stonehenge (which no longer works for Pt/Pd) or for that matter, Old Platine which wanted very high humidity. Also, the OHP material is much thinner and more flexible than real film, which makes me think the vacuum frame is overkill for the 11x14 prints I'm planning to make. Maybe the film doesn't need to be crushed against the paper with 24 psi.

So I removed the vac frame and repositioned the exposure unit to it's normal pizza oven arrangement, using a standard spring-back frame. Since the regular window glass in this frame is much more transparent than the heavy plate glass in the vac frame, I had to do a new test for minimum time to dmax with the new configuration.

Guess What I'm Doing Today

Woodbury, Connecticut

The little shock absorber things that are supposed to support the lid of the vac frame have lost their juice, so a film box has to substitute.


Six minutes seems like the magic number for the negative material.


Exposure is finished.


You can see the faint print-out image here after exposure.


In the developer.


OK, I know it looks like a mess, but I know where everything is!

Thursday, May 02, 2013

Next Step

Woodbury, Connecticut

Time to try a full size print. Two tests earlier this morning confirmed the basic print exposure time.

Wednesday, May 01, 2013

Surprise, Another Test

Woodbury, Connecticut

A sheet of 13x19" Pictorico® OHP Film emerging from the printer. There are eight approximately 4x5" negatives ganged up on it.


The black and yellow inks in the Epson K3 set are known to be the best UV absorbers, so the print driver has been set to maximize use of those inks. The result is remarkably similar, viewed by visible light, to the appearance of ordinary film negatives that have been developed in a staining pyro formula. The pyro stain is a UV blocker and is proportional to the main silver image. Something very similar is going on here.


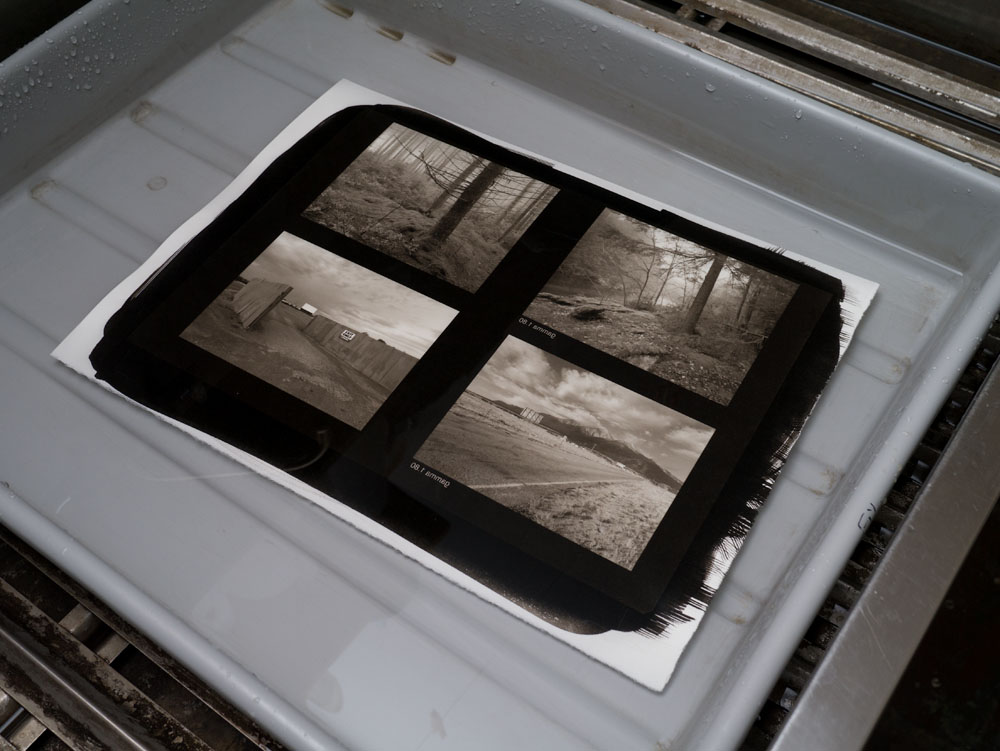
Printed at the standard exposure time determined by test exposures of the step tablet, things look promising in the clearing bath.


Another of the small test pairs, this time two pictures made in Iran and India back in 1969/70, never before printed in platinum.

Still More Testing

Woodbury, Connecticut

Actual pictures will be the real test of the digital negatives, but there are things that are a lot easier to learn from printed step tablets. Complicating matters here is that I haven't done much printing for a while because I was busy with other projects and in the meantime my old favorite papers no longer work well. The good news is that there are now two papers being made specifically for platinum printing, and both have looked promising when we've used them at my platinum workshops at CAP. The bad news is I haven't used them enough to know all the quirks and tricks needed to get the best results from them. So, I'm basically testing/exploring the two papers at the same time I'm testing/exploring the digital negatives. Just the opposite of working with a single variable at a time. 


Two negatives about 4x5 inches set on the prepared sheet of paper, placed in the vacuum frame. Once the frame is powered up it gets swung up vertical, against the box of UV light tubes.

On top is a straight negative print of the step tablet file. Below, a negative made with the tonal scale adjusted to bring it into line with the sensitometric response of the Pt/Pd print mixture on this paper. The red strips are Rubylith, which is totally opaque to UV light. They are placed to overlap the top row of the tablet where there are patches at 10% and 0% density. The area under the Rubylith gets no exposure at all, so I can compare those very light patches to pure paper white once the print has been processed and dried.

Testing, Testing, Testing...

Woodbury, Connecticut